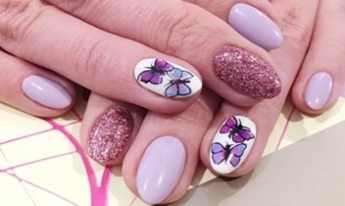
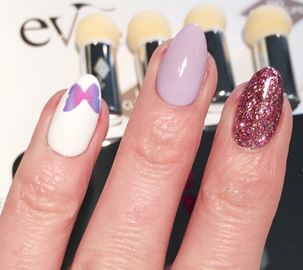
Perfect for this Spring and Summer, this butterfly nail design is easy to create with the Bio Sculpture High Pigment Gel Nail Art Kit.
Products used
- Bio Sculpture #1 French White or EVO Whitney
- Bio Sculpture Soft Gel
- Bio Sculpture Base Gel or EVO Oxygenated Base
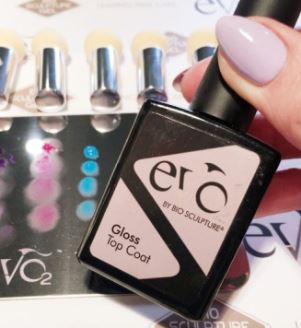
- Bio Sculpture Gloss Gel or EVO Gel Gloss Top Coat
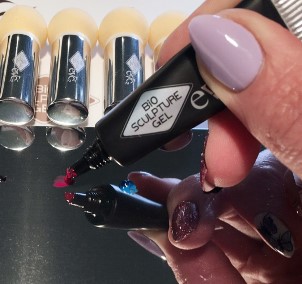
- Bio Sculpture HP Gel Nail Art Kit
- LED Lamp
- Fine Line Application Brush
Preparation – Nail art is to be applied over a pre-prepared white nail which has been covered with a base gel and the sticky inhibition layer removed. (We recommend using either Bio Sculpture #1 French White with Bio Sculpture Base Gel or EVO Whitney with EVO Oxygenated Base).
Step 1 – Select the colours that you want to use to create your image and place a small amount of each onto the metal mixing plate.
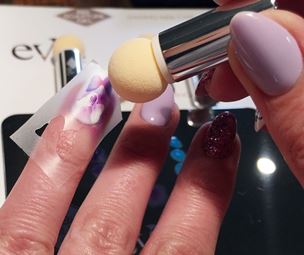
Step 2 – Remove the stencil from the backing sheet and place it on the nail. With a very gentle pressure, start puffing with your first colour over the stencil.
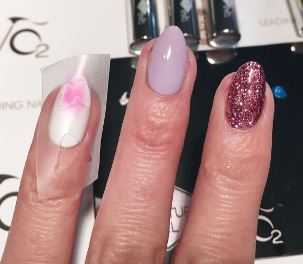
Step 3 – With a new puffer, start adding more of your selected colours to effortlessly create a beautiful airbrushed effect with exceptional colour blending.
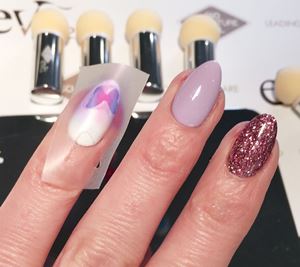
Step 4 – Remove the stencil and FLASH CURE the nail under an LED Lamp for 10 seconds.
Step 5 – Using the same stencil, repeat steps 2-4.
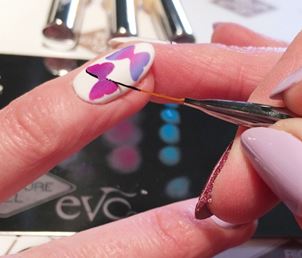
Step 6 – Outline the Butterfly with the black Bio Sculpture High Pigment Gel and a fine line application brush.
Step 7 – Create patterned dots on the butterfly’s wings with the Bling Dotting Tool and CURE nail for 30 Seconds.

Step 8 – Finish your design with Gloss Gel – CURE (We recommend using Bio Sculpture Gloss Gel or EVO Gloss Gel for a chip free long lasting high shine).
For more information visit www.biosculpture.com.au